This product is no longer available for sale.
The seller may be offering an improved version or it may be hanging out on the beach, enjoying the retired life.
NOW WITH MAPPYDOT PLUS SENSORS! The mBot educational programmable robot is an awesome learning tool for STEM or DIY applications. It can be programmed to follow lines and avoid close range obstacle…
Read More…NOW WITH MAPPYDOT PLUS SENSORS!
The mBot educational programmable robot is an awesome learning tool for STEM or DIY applications. It can be programmed to follow lines and avoid close range obstacles in front of it. But what if it could see all around, with millimeter precision?
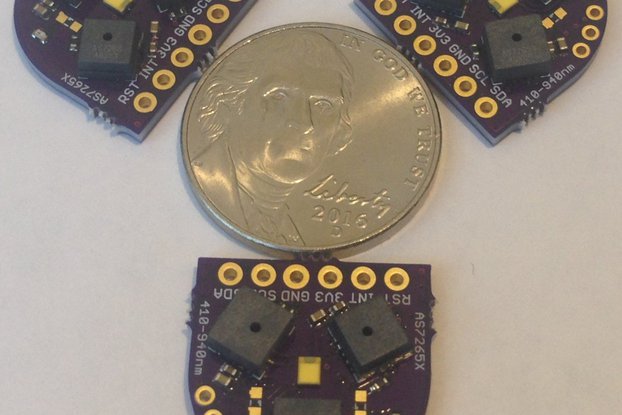
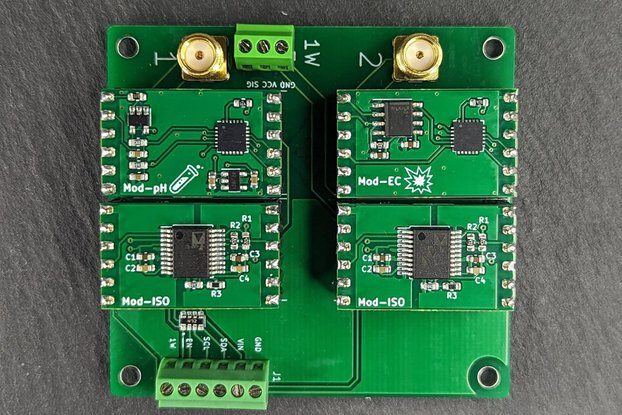
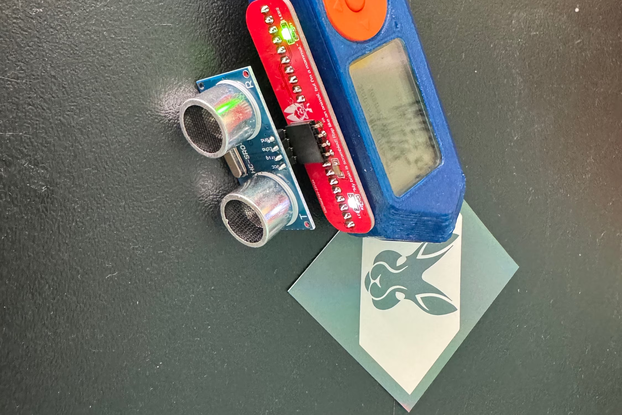
The LiDAR Hat upgrades the mBot to include 4 directional MappyDot Plus distance measurement sensors (front/rear, left/right; each sensor has an adjustable 15-27-degree viewing angle), which allows it to see the world around it. With these sensors onboard you can program your mBot to wander around the room while avoiding obstacles and animals.

It is perfect for the classroom as well. Program the mBot to traverse mazes, map out objects in the room or even create interactive games such as move and the mBot will pounce!
The LiDAR Hat is very simple to use. All you need to do is connect it to one of the ports, import the Scratch extension and you are ready to start measuring.

Simple Scratch example to have the mBot move away from objects that get too close.
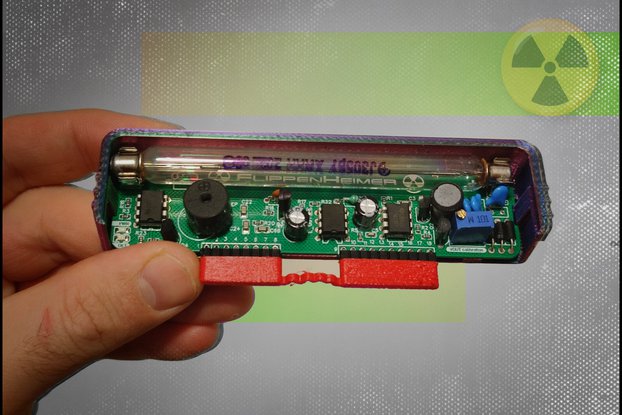
The kit includes everything you need to connect and attach to the mBot. It also includes zip ties. The mBot doesn't require pull-up resistors on the I2C lines, but there is provision for optional through hole or surface mount resistors on other platforms such as Lego NXT/EV3 or other robot platforms. Does not include the mBot

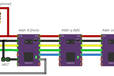
The MappyDots get their incremental addresses counter-clockwise (looking from the top). The corresponding locations above are relative to the "viewing point" of the mBot, i.e. what it sees. These locations match the code, but can be changed as you see fit. The RJ25 connector pins on the hat boards are labelled on the rear of the board.
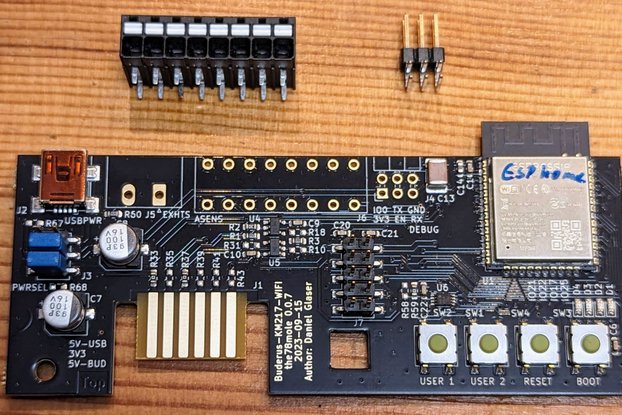
The Hat's main board contains optional pads for SMD or through hole I2C resistors. The mBot does not require these as they are already installed near the control board, however other platforms might require it (such as the Lego EV3).
The Hat's main board also has an MST pad which is normally shorted to make the front MappyDot a master (address 8) as per the schematic above (this will be soldered if you specify assembly in your order). You can re-orientate the sensors by shorting the MST pads on the MappyDot board instead (as the address lines are looped around the array of MappyDots by the Hat) and placing the master in the direction you prefer. As mentioned, the addresses are incremented counter clockwise, so just work around the array to get the orientation of the other sensor addresses.
Be sure to remove the plastic tape cover on the sensors before use. The plastic tape isn't calibrated for and will interfere with the readings.

Please allow an extra day for shipping if choosing the assembly option. We normally ship within 2 days for kit versions.


/i/45147/products/2018-02-03T14%3A33%3A28.227Z-DSC_5750ss.jpg?1606306133)