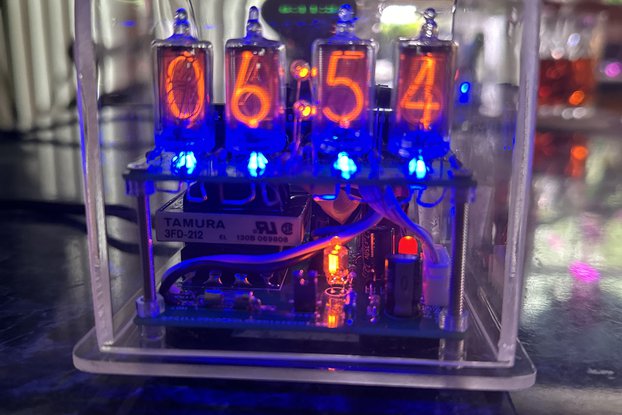
Kit for the B7971 6-digit Nixie clock does not include any tubes, wifi optional, homemade enclosure optional.
Designed by Oscilloscope clocks in United States of America
Buy with confidence.
Our Tindie Guarantee protects your purchase from fraud. Learn More
This is a store featuring my homemade electronic novelty clocks, made using obsolete electronic tubes, and my kits designed for diy for these clocks.
This is a kit for B7971 nixie tubes. This is a six-digit version, including the PC board, the transformer, the pre-programmed microcontroller, and the components, including the pins to connect the tu…
Read More…This is a kit for B7971 nixie tubes. This is a six-digit version, including the PC board, the transformer, the pre-programmed microcontroller, and the components, including the pins to connect the tubes to the board. Text can be entered to scroll through as a 50 - character message once per minute, using the wifimodule to connect to the PIC and enter the text from a smartphone.
Parts List For Nixie 7.7
Capacitors Miscellaneous
1 - 1,000uF, 35V 1 - Transformer - 120/240VAC primary, 12.6VAC secondary, 200ma 2 - 2.2uF, 350V 1 - Fuse - 250V, 500ma (.5A) 1 - 103 (.01uF) 1 - 4 pin jumper/header 1 - 100uF, 25V 4 - tactile pushbuttons, normally open 5 - 104 (.1uF) 1 - 8 pin IC socket 1 - 20MHZ crystal Diodes 1 - Rectifier bridge, 25V 1 - 3.3VDC regulator 2 - 1N4007 1 - Heat sink, washer, pad, screw 2 - 1N4001 1 - Red led, 5mm 6 - RGB leds, 5mm 5 - Neon lamps (1 indicator, 4 colons) 2 / 4 - Hookup wires, AC supply/colons Transistors 2 - Test tube 90 - nixie tube pin sockets 35 - MPSA(KSP)44 NPN high voltage 1 - Chip - 18F97J60 preprogrammed 7 - A92 PNP high voltage 1 - PC board 1 - 2N3904 1 - Five pin socket for wifi module 1 - 18F97J60 100 pin socket Resistors (1/4 watt, unless noted) 1 - 12f683 chip preprogrammed
1 - 220 ohm, 1/2 watt 1 - 1M 1 - 220K 8 - 100K 1 - 10K 1 - 1K 1 - 470 ohm 5 - 2.2K 6 - 47K 35 - 33K 7 - 470K 4 - 120K 3 - 100 ohm
Instructions for Nixie 7.7:
The display will show either 33:33:33 (wifi/gps enabled) or 11:11:11 (disabled) Press fast set to select 33:33:33 (wifi, auto time set) Press slow set to select 11:11:11 (manual time set)
Note: In order to bypass the normal setup and skip loading stored settings, it is possible to go directly to manual time set by holding "ledcolor" button at startup (plugged in) until the display passes :12:
Note: To store settings in memory, the led color button must be pressed at least once, which will change the colors. If you want to return to a color, simply continue to hold down on the button and it will cycle through the 12 selections until you have your prefered color displayed. This will be saved in memory as well, so all settings will return to the last settings before power down.
Next, the display changes to either 60 (60HZ, USA) or 50 (50HZ, some other countries) If the wrong frequency is displayed, please unplug & power down then wait ten seconds and restart.
Display then changes to 12 (default 12 hour format)
To change the date format to European DD/MM/YYYY (default is USA format): Unplug and power down, then plug in and when the display is "12" press fast set until the display changes to either "USA" or "EUR" then press slow set to choose one, and press ledcolor to set. Setup will resume from "12" and date format will be saved.
Display then cycles to 11:11:11 and may display 33:33:33 alternating to 55:55:55 while the time & date are being acquired from the network/gps signal
The display should then autoset to the correct time.
Refresh time from network - fast set + slow set
Select time, date or text display - fast set + ledcolor, slow set to select, toggle to set
Twelve or twenty-four hour clock format - fast set + toggle, slow set to select, ledcolor to set
Set up preset on/off display times - ledcolor + toggle, fast set/slow set to select, ledcolor to set/move to next screen
Select time zone - slow set + toggle, fast set to select, slow set to set
Select DST on / off / auto - slow set + ledcolor, fast set to select, toggle to set
To enter text message (up to 50 characters, including white spaces), press and hold the "reset" button on the wifimodule board until the blue led lights on the board (not the one on the chip that blinks) Go to your networks on your device and connect to the "WifiModule" network, as when setting the module up initially, but instead of hitting the WifiModule connect apage, instead type the address - 192.168.4.1/TextInput This will pull up the text input page where you can enter the text message and hit "Submit" button on the page. Once the module automatically re-connects to wifi, refresh the display by pressing fast set & slow set simultaneously, and the message will be displayed on seconds count 43.
Time zone 1; EST
Time zone 2; CST
Time zone 3; MST
Time zone 4; PST
Time zone 5; AKST
Time zone 6; HAST
Time zone 7; BST
Time zone 8; CEST
Time zone 9; MSK
Time zone 10; PHT
Time zone 11; ACST
Time zone 12; Asia/Seoul
Time zone 13; SGT (Singapore)
Time zone 14; IST
No country selected, please select your country to see shipping options.
No rates are available for shipping to .
Enter your email address if you'd like to be notified when Kit for B7971 6-digit Nixie clock with WiFi & text can be shipped to you:
Thanks! We'll let you know when the seller adds shipping rates for your country.
Shipping Rate | Tracked | Ships From | First Item | Additional Items |
---|---|---|---|---|
:
|
Buy with confidence.
Our Tindie Guarantee protects your purchase from fraud. Learn More
Finksburg, MD, United States of America
Ships from United States of America.
4 Reviews | 104 Orders
$265.00
Free Shipping!
$130.00
Free Shipping!
$300.00
Free Shipping!
$250.00
Free Shipping!
$105.00
Free Shipping!
$275.00
Free Shipping!
$240.00
Free Shipping!
$250.00
Free Shipping!
$200.00
Free Shipping!
$175.00
Free Shipping!
$100.00
Free Shipping!
$265.00
Free Shipping!
By clicking Register, you confirm that you accept our Terms & Conditions
We recognize our top users by making them a Tindarian. Tindarians have access to secret & unreleased features.
We look for the most active & best members of the Tindie community, and invite them to join. There isn't a selection process or form to fill out. The only way to become a Tindarian is by being a nice & active member of the Tindie community!