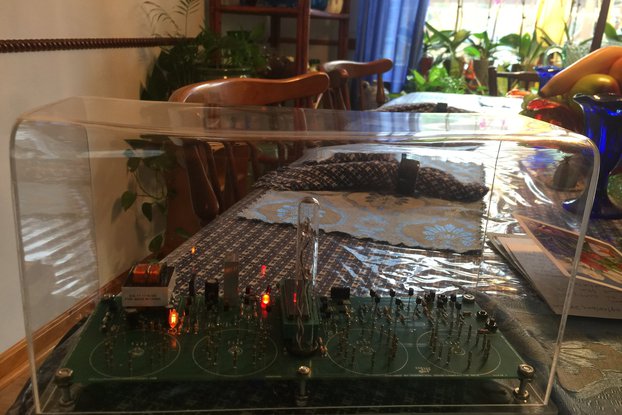
A clock made using the vacuum fluorescent display tubes (VFD) type IV-11 from old Soviet era stock.
Designed by Oscilloscope clocks in United States of AmericaNo shipping info available.
Set destination country to see options
Shipping to starts at
Free shipping is available to !
Ships from
This item does not ship to .
More Info
Sign up to get notified when this product is back in stock!
This is a store featuring my homemade electronic novelty clocks, made using obsolete electronic tubes, and my kits designed for diy for these clocks.
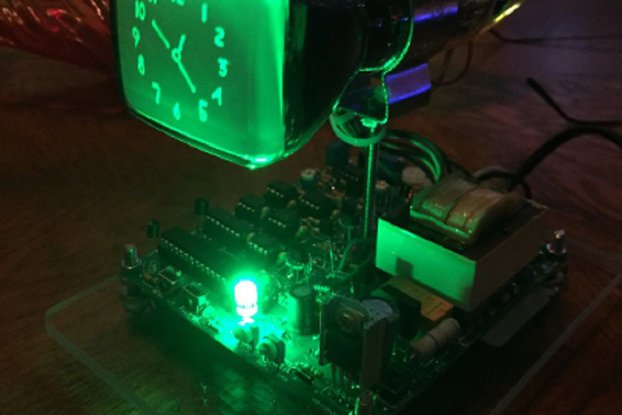
The VFD clock is a homemade electronic clock using IV-11 Soviet era vacuum fluorescent display tubes. It has RGB LED under-lighting that is user selected for different color combos. It is made using…
Read More…The VFD clock is a homemade electronic clock using IV-11 Soviet era vacuum fluorescent display tubes. It has RGB LED under-lighting that is user selected for different color combos.
It is made using "old school" components that are all easily replaceable/reparable by the tech or hobbyist. The chips are in sockets for easy replacement.
It has many features built in the firmware including preset on/off times to turn the display on & off for conserving the tubes.
It also has an optional calendar and rudimentary alarm option.
Below is a description of the instructions and features.
I will ship worldwide; however, I cannot be responsible for any customs fees or inspections in your country. Obviously, it is a novelty item meant for entertainment only, and since it is homemade, user discretion is strongly advised.
Instruction set for VFD clock
Note: If your clock has battery backup, in order to start from this point, you should:
4) Plug battery back in
When plugged in, the blue LED should light immediately, and the display will read 00:00:00 for five seconds.
To enable the calendar to display, press either fast set or slow set once, and the display will change to 11:11:11 for three seconds. This means the calendar has been enabled.
The tubes should then display 1:11 for three seconds for 60HZ, or 0:00 for 50HZ. If the wrong frequency was erroneously detected, please unplug it, wait until the LEDs go out, and then plug it back in.
Next the tubes should display: 12 (12-hour format, the default setting) for three seconds. To choose 24-hour format, press the fast set button once, and the display should be: 24 for three seconds, then display will show 1:00:00 (or 12:00:00 if 12 hr. format) and normal time keeping begins, set buttons operate as fast set / slow set, (hours / minutes).
To set the calendar date: Press and hold fast set, then press and also hold the toggle button (button in the back) at the same time, and the date will fast set. Release the toggle button, but hold the fast set, and the date will display until fast set is released. Next hold down slow set & toggle to slow set the date. Again, release toggle while still holding down slow set and the date will display until slow set is released. The date should appear on the second’s count of 50 to 53. It is in mm/dd/yy format. Please refer to the YouTube for illustration: YouTube demo
To manually turn the display on/off, push the button in the back (toggle) and hold for no longer than one second until the display toggles.
To program the preset on/off times from normal time keeping mode: Press both buttons and the display will blank. Press the fast set button to increment hours to the desired-on time (: 1 after the hour indicates AM,: 0 indicates PM). Press slow set to confirm your choice, and the hour you selected will appear with :00 for PM, :11 for AM. To set the alarm for this time, press fast set again, and “1” will be displayed on the last nixie. (xx:xx:x1 ) Please refer to YouTube for illustration: alarm demo
Press either button once to enter the OFF time set mode. Follow the same procedure, and after the OFF time is confirmed (: XX appears after the hour selected), press slow set button to enter normal timekeeping (fast set, slow set) mode. To program a second set of sleep / wake times, press fast set and repeat the procedure for a second time. Please refer to the YouTube link for illustration: 2nd on/off times setup demo
Note: The clock will display 12:00 AM to start (1:00 AM if in 24HR mode) so if the present time is after noon, you will need to advance the time past 12:00 in order to reach the PM hours (if in 12 HR mode) else the preset on/off times may be reversed. I.E.: if the present time is 8:00 PM, you need to advance PAST 8:00 once, then stop at 8:00.
To change the color of the LED under-lighting, press the LED color button until the color changes. If the button is held, it will cycle through all the color choices until it returns to blue (default color).
Thanks again for your purchase!
No country selected, please select your country to see shipping options.
No rates are available for shipping to .
Enter your email address if you'd like to be notified when VFD clock using IV-11 big Soviet era vacuum tubes can be shipped to you:
Thanks! We'll let you know when the seller adds shipping rates for your country.
| Shipping Rate | Tracked | Ships From | First Item | Additional Items |
|---|---|---|---|---|
|
:
|
No shipping info available.
Set destination country to see options
Shipping to starts at
Free shipping is available to !
Ships from
This item does not ship to .
More Info
Sign up to get notified when this product is back in stock!
Finksburg, MD, United States of America
Ships from United States of America.
4 Reviews | 111 Orders
$395.00
Free Shipping!

$325.00
Free Shipping!
$325.00
Free Shipping!

$325.00
Free Shipping!
$105.00
Free Shipping!
$100.00
Free Shipping!
$130.00
Free Shipping!

$265.00
Free Shipping!
$175.00
Free Shipping!

$100.00
Free Shipping!
$9.34 $10.99
Free Shipping!
$200.00
Free Shipping!
By clicking Register, you confirm that you accept our Terms & Conditions
We recognize our top users by making them a Tindarian. Tindarians have access to secret & unreleased features.
We look for the most active & best members of the Tindie community, and invite them to join. There isn't a selection process or form to fill out. The only way to become a Tindarian is by being a nice & active member of the Tindie community!
