Photosensitive Mobile Robot Simulation Firefly Electronic DIY Kit
Sold By ICStationThis seller is taking a break until June 16, 2025. Sign up below to get an email when they're back!
No shipping info available.
Set destination country to see options
Shipping to starts at
Free shipping is available to !
Ships from
This item does not ship to .
More Info
Sign up and we'll send a reminder when the seller returns!
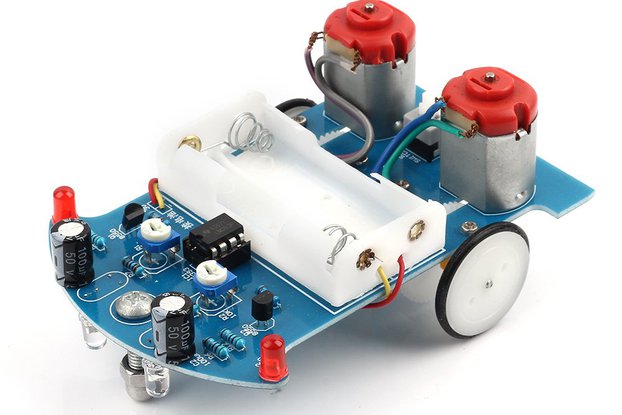
1.Introduction: SFT-Q03YH is a Photosensitive Mobile Robot Simulation Firefly Electronic DIY Kit. It can simulate the automatic flashing of fireflies, and automatically move towards light at night …
Read More…SFT-Q03YH is a Photosensitive Mobile Robot Simulation Firefly Electronic DIY Kit. It can simulate the automatic flashing of fireflies, and automatically move towards light at night according to the photosensitive sensor.
After turning on the switch, the LED light on the tail flashes like a firefly glowing. When the light enters the two antennae, the firefly will move. A very interesting Mini DIY electronic product, which enables users to understand the circuit more clearly and learn welding skills.
Exercise Hands-on Ability: We offer PDF Installation manual to guide you complete it step by step. This was super fun and challenging kit for kids, students, electronics lovers to practice their hands-on ability and soldering skills. Suitable for children and electronic beginners.
LED light flashing frequency is adjustable: The flashing frequency of the blue LED light at the tail of the firefly can be adjusted by a potentiometer.
Please kindly noted: The battery is not included. Please prepare a CR2032 Battery by yourself.
Sensitive movement: There are two photosensitive sensors on right and left (R1/R4) which simulating the antennae of fireflies. When the light reaches the antennae R1 or R4, Transistor Q1 or Q2 will turn ON and then the corresponding motor starts to vibrate, so that the firefly moves in the direction of light.
Breathing light: The breathing lamp circuit is controlled by lm358 chip, which can simulate the effect of firefly's slow ON and OFF.
The LED breathing light will turn OFF when moving.


Step 5: Install 2pcs 10Kohm Metal Film Resistor at R9,R10. Identify the resistor value as shown in color:Brown/Black/Black/Red/Brown.
Step 6: Install 3pcs XH2.54-2P Male Pin at M1,M2,DC3V.(Users don't have to install them)
Step 10: Install 1pcs 5mm Blue LED at LED.The longer pin is inserted into mark ‘ + ’ (positive pole).
Step 11: Install 1pcs 100uF Electrolytic Capacitor at C1.Pay attention to distinguish between positive and negative.The Longer pin is positive pole which marked ‘ + ’.
Step 15: Install 2pcs MG5516 Photoresistor at R1,R4. Note:The distance between the sensor and PCB is about 10mm.
Step 16: Put 2pcs Heat Shrinkable Tube on MG5516 Photoresistor.
Step 20: Paste PVC bracket onto PCB with a Double Sided Adhesive Tape.
Step 21: Paste 2pcs motor on PVC bracket.
No country selected, please select your country to see shipping options.
No rates are available for shipping to .
Enter your email address if you'd like to be notified when Photosensitive Electronic Firefly Robot DIY Kit can be shipped to you:
Thanks! We'll let you know when the seller adds shipping rates for your country.
| Shipping Rate | Tracked | Ships From | First Item | Additional Items |
|---|---|---|---|---|
|
:
|
No shipping info available.
Set destination country to see options
Shipping to starts at
Free shipping is available to !
Ships from
This item does not ship to .
More Info
Sign up and we'll send a reminder when the seller returns!
$2.99
Free Shipping!
$2.59
Free Shipping!
$2.99
Free Shipping!
$7.59
Free Shipping!
$2.99
Free Shipping!
$5.99
Free Shipping!
$1.19
Free Shipping!
$2.59
Free Shipping!

$21.99
Free Shipping!

$8.79
Free Shipping!
$7.79
Free Shipping!

$4.79
Free Shipping!
By clicking Register, you confirm that you accept our Terms & Conditions
We recognize our top users by making them a Tindarian. Tindarians have access to secret & unreleased features.
We look for the most active & best members of the Tindie community, and invite them to join. There isn't a selection process or form to fill out. The only way to become a Tindarian is by being a nice & active member of the Tindie community!
