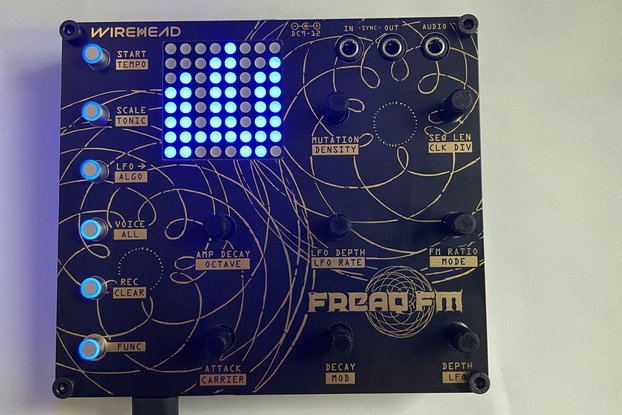
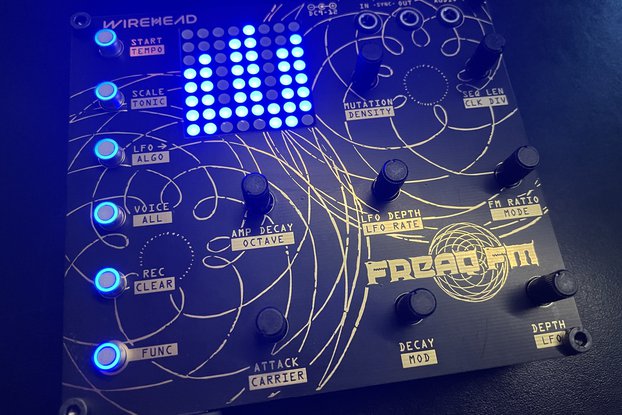
More fun than you can believe. Total zen flow machine.
For Freaq FM Digital Synthesizer (DIY Kit)
First thing that jumped out at me was a little detail, but it goes a long way down easy street: Every single resistor is labelled! No need to play resistor roll-call or consult your color-code-cryptex, or get your strained eyes checked. The build could not have been easier. All boards and components came packaged in sealed anti-static bags. The anti-static bags were amply padded in a neat accordion/slat-perforated corrugated paper product, and boxed in an attractive black box emblazoned with the WireHead logo.
The paper leaflet with the Bill of Materials and list of key precautions (such as the usual 'align before you solder') was comprehensive enough, and includes a link to a more detailed build walk-through. In my build I got lucky with the 8x8 LED matrix which I had failed to align-before-soldering, but it all went together well.
A few notes on the components:
-The BOM lists a "1uF monolithic capacitor", with "C106MON" as the part number, which in my kit was the little and tiniest blue capacitor. When I examined it closely, it was inscribed with "105" rather than "106", but I installed it anyway, and it works perfectly.
-The instructions describe that the (6x) 470R resistors can be substituted with a different value (from your own stash of resistors) to determine the brightness of the illuminated push-buttons, but no alternate values were suggested, so I used the 470R resistors, and the brightness is frankly perfect.
-Similarly, the 200k resistor can also be substituted to affect the brightness of the 8x8 LED matrix. This is a resistor I would consider swapping on my next build, because I do find the matrix LEDs a little bit dazzling to the point that I have to deliberately blur my vision to decipher the (otherwise very novel and intuitive) display. Alternatively, if one were to 3D print some side panels, perhaps a 500k pot could be modified into the mix (or maybe a 200k resistor in series with a 100k pot).
[EDIT: I discovered and can attest that the latest firmware actually allows you to control the matrix display brightness through the software (by means of PWM speed presumably). No need to get too tricky or overthink the 200k resistor substitution option. I'm also considering 3D printing a little lense/cover type thing for the display in clear ABS or clear PETG to see if diffusing the light might help blend/even out the pixelation.]
As for fitment, all the panels and associated controls are impeccably spaced in relation to each-other. It is a very well thought-out design, and the component footprints are spot-on. This is the first time I've built a DIY synth where I didn't have to fight to get even a single potentiometer's legs spotted into their stations. A note on the arduino header pins: Per the instructions, the short side of the pins sit inside the DIP socket, and the long side protrudes out the top of the nano. When it comes time to trim the header pin excesses from the top of the 'duino, there's no need to go crazy. I trimmed them down to the blob and have at least 3mm of clearance, so feel free to not get carried away.
Yadda yadda, bada-bing, it's assembled, and you plug it in. Instant fun. This machine (as a generative synth) is a bit like a pet. It has a mind of its own, generating a random initial pattern which it repeats until you turn the "Mutation" knob and give it permission to tweak the pattern. Learning this animal's language is half the fun! Experimenting with the myriad of features really feels like diving into the deep end, in the very best way.
[EDIT: When you first start exploring the synth, take my advice on this; Print the user manual, power the Freaq up, plug it into some amplification, and play away. Here's the important part: Don't unplug it and put it away after noodling around for a while, because every time you turn a page or re-read a page you WILL find another feature you want to explore. If you take this advice, you'll have a prolonged and exciting honeymoon.]
If you're fond of FM synthesis as you've known it (in the DX7 sense), just wait until you see how wild it can get when you're not limited to just sine waves mangling each-other! Purely by accident I was getting some TB-303-esque acid lines from this little beast. I predict I'll be chasing that dragon for at least a few sessions!
What else can I say? The artistic and aesthetic details are very tasteful. I almost want to operate this machine with white gloves because finger grease on the beautiful matte-black solder mask feels like a sin. This might actually be the first build where I actually clean off the flux residue!
Although it's tempting to hesitate based on the price (which can't be described as cheap), you do get a compact and well designed machine (with evidently flawless pre-flashed code) and a raft of features for your money. I don't regret rolling the dice, and I am seriously considering buying a second kit.
WireHead Andrew, please keep innovating, and please keep up the good work. You've really put something special out into the world.


