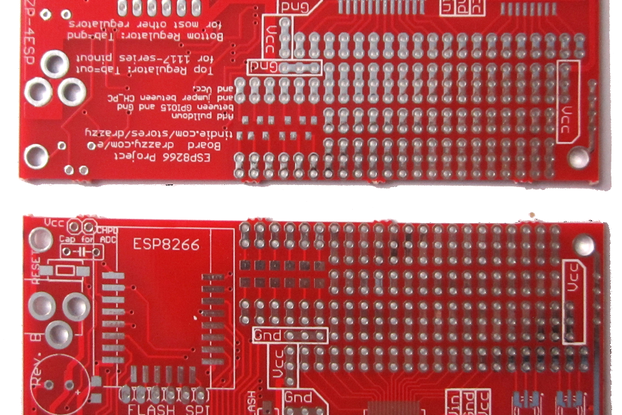
The RFX 328p dev/dep board can be ordered as a bare PCB or a kit.
Designed by pico in Australia
Buy with confidence.
Our Tindie Guarantee protects your purchase from fraud. Learn More
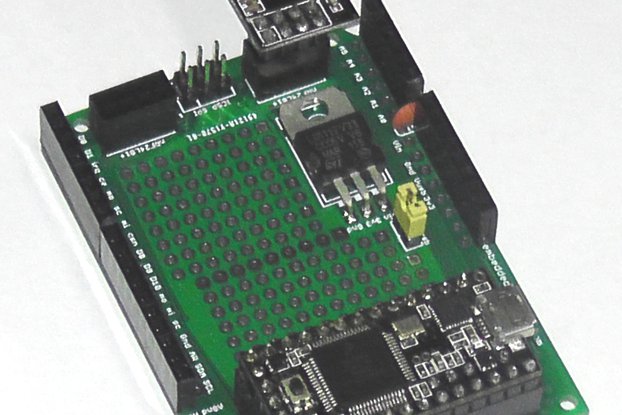
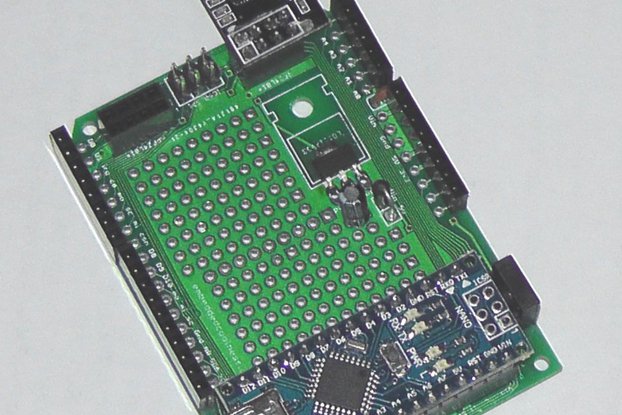
Overview The design is a compact but flexible Arduino Uno-class dev board with built-in nRF24L01+ module headers, and a small but usable prototyping area. The dev board has been designed primarily a…
Read More…The design is a compact but flexible Arduino Uno-class dev board with built-in nRF24L01+ module headers, and a small but usable prototyping area.
The dev board has been designed primarily as a minimalist, low-cost deployment board for wireless nRF24L01+ enabled Arduino projects. If you are wanting to deploy lots of nRF24L01+ enabled projects without breaking the bank, this board may be just what you need!
However, its flexible design makes it useful for economical deployment of non-nRF24L01+ enabled projects as well. There are a lot of features in a small package.
It uses all through-hole components, so nothing more than basic soldering skill and equipment is required to assemble it.
The default configuration is for a 3v3 board running an Atmel Atmega328p at 16MHz, as it was originally designed as part of the Radio For X:duino (RFXduino) project, as a low-cost deployment board for wireless nRF24L01+ enabled projects.
For wireless project flexibility, there is a choice between two nRF24L01+ module connection headers on the dev board: One header connects to the hardware SPI pins D11-D13, while the other header connects to alternative set of pins (D4-D6) for a “bit-banging” software SPI implementation, if preferred. For both headers, IRQ pin is set at D2, CE is D3 and CSN is D7.
The board design supports the standard Arduino shield header layout, as well as a second breadboard compatible (i.e., proper 0.1″ pitch grid-aligned) header layout, so you can design your own “shields” using common 50mm (or wider) proto board -- just check you’ve got at least 18 through holes at 0.1″ pitch to span the second header layout. (See photos 4 & 5 above for example of use of secondary headers.)
It also has provision for adding a 10uH inductor to the analog section of the power supply circuit, as recommended by Atmel in their data sheets. This is actually an improvement over the Uno circuitry, which doesn't include the inductor (although Massimo Banzi has suggested this might appear in a future revision). Adding it results in a less noisy reading of analog input values on pins A0-A5.
To keep cost, complexity and size low, it is without USB connectivity, so it must be programmed using either a programmer (e.g., a USBasp) via the ICSP header, or a USB to serial adaptor board (if a serial bootloader is installed on your 328p chip.)
Also, we've left the choice of power supply connection open, as there are potentially many ways you might want to do this (battery, dc via header connections, etc.). The photos show a simple screw-terminal block connector and pig-tail lead as one possibility, and these parts are available as an ordering option, but in the interests of flexibility, are certainly not mandatory.
As mentioned, the RFX 328/nRF24L01+/proto dev board had been designed originally as a minimalist, low-cost deployment board for wireless nRF24L01+ enabled projects. You can use it to get an Uno-class wireless node deployed for < $20, all up -- including radio module! (which was the target price point.)
And, if connected to a Radio For X:duino (RFXduino) nRF24L01+ <-> TCP/IP gateway, you can even get a bunch of these running as full web clients and servers over nRF24l01+ (send emails, Xively updates, run as web servers, etc... the whole TCP/IP deal. WiFi shield capability at a nRF24 module price!)
So "mesh" or "WiFi" wireless connectivity, it's your call.
On the hardware side, the board already provides a small prototyping area, but if you need more for your project, plugging one of these onto a 5cm x 7cm proto board via the breadboard compatible headers is a great way to instantly get a lot of additional prototyping real estate (“great” as in “super easy and inexpensive” :-).
If you prefer to clock the 328p at 8MHz rather than 16MHz, you can either use an 8MHz crystal in place of the 16MHz part, or configure the 328p fuses to use the internal 8MHz clocking option, eliminating the need for the crystal entirely.
If you want to run the board as a 5V board, just use a 5V regulator in place of the 3v3.
In a 5V configuration, if you wanted to connect a nRF24L01+ module, you would need to use a nRF2401+ proto shield (or equivalent) with it’s own 3v3 regulator (while nRF24L01+ data pins are 5V tolerant, Vcc supply to a nRF24L01+ module must not exceed 3.6V).
One advantage of this arrangement, however, is that you get two fairly beefy power supply rails, at both 3v3 and 5V, useful for projects requiring dual voltages.
So: A compact and minimalist option for the economical deployment of an Arduino project, offering lots of extensibility and configuration possibilities!
Kit documentation (.pdf):
RFX 328p Assembly instructions (short)
RFX 328p Assembly instructions (long)
(Extra kit photos available via the "Documentation" button.)
No country selected, please select your country to see shipping options.
No rates are available for shipping to .
Enter your email address if you'd like to be notified when RFX 328p dev/dep board w/ nRF24L01+ headers (Kit) can be shipped to you:
Thanks! We'll let you know when the seller adds shipping rates for your country.
| Shipping Rate | Tracked | Ships From | First Item | Additional Items |
|---|---|---|---|---|
|
:
|
Product: (None)
Documentation: (None)
Shipping: (None)
Communication: (None)
Mats | Dec. 23, 2013
Buy with confidence.
Our Tindie Guarantee protects your purchase from fraud. Learn More

$25.00
Free Shipping!

$5.50
Free Shipping!

$6.50
Free Shipping!

$3.50
Free Shipping!
By clicking Register, you confirm that you accept our Terms & Conditions
We recognize our top users by making them a Tindarian. Tindarians have access to secret & unreleased features.
We look for the most active & best members of the Tindie community, and invite them to join. There isn't a selection process or form to fill out. The only way to become a Tindarian is by being a nice & active member of the Tindie community!
