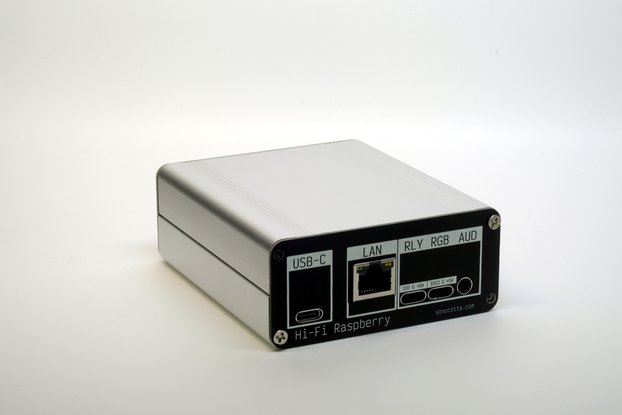
Raspberry Pi Hat powered by two PCM5100 DACs paired with TPA3110 D-class amp
Designed by Sonocotta in Poland
Buy with confidence.
Our Tindie Guarantee protects your purchase from fraud. Learn More
What is it? The Amped Raspberry Pi Hat is a PCM5100 HiFi DAC combined with a highly efficient TPA3110D2 D-class amplifier. It brings all the best from the HiFi Raspberry Pi Hat model and adds an onbo…
Read More…The Amped Raspberry Pi Hat is a PCM5100 HiFi DAC combined with a highly efficient TPA3110D2 D-class amplifier. It brings all the best from the HiFi Raspberry Pi Hat model and adds an onboard amplifier to form a complete solution that can be paired with speakers directly. It uses an external power source to feed hungry amps and host Pi using an onboard drop-down converter.
| 1X | 2X |
|---|---|
Amped Raspberry Pi Hat comes in two flavors: 1X hat is a stereo DAC and stereo Amp that will work with pretty much any Raspberry out there, while 2X Hat is a dual setup delivering 4 independent channels using Raspberry Pi 5 capability of multi-channel I2S.
I did a few audio projects in the past, some using ESP32, some using larger Orange Pi and Raspberry Pi devices. Each has its pros and cons, and with each iteration, I'm trying to focus on the details that were working best for me while actually using them.
What is special about the Raspberry ecosystem is, of course, its community support. Being a not-so-strong software developer, I often have to rely on the work that other people did and baked into the base Raspbian image. Attaching a DAC, Ethernet, and IR reader is as simple as adding 3 lines into config.txt file. All the device tree definitions, kernel drivers, and dependency packages are already in place, believe it or not.
Sure, compared to the ESP32 platform, it is not as lightweight. It requires more power, it takes some time to boot. But when it comes to rapid development, there is nothing like the Raspberry Pi.
Amped Raspberry Pi uses the legendary PCM5100 series DAC with supreme audio quality. It feeds its output to the TPA3110 D-class amp with both great sound and unbelievable power efficiency. You can use it with either small or large speakers directly plugged into the Hat. The hat will require an external power source to drive your speakers properly, but it will also power Pi itself through a power-efficient drop-down regulator, allowing the whole setup to run using a single power source. It is absurdly simple to set up, as it uses no extra configuration compared to the PCM5100 DAC itself, so any Raspberry Linux distribution has everything you need.
| HiFi Raspberry Media Center and Hat | Amped Raspberry Media Center and Hat | Loud Raspberry Media Center and Hat | Louder Raspberry Media Center and Hat | |
|---|---|---|---|---|
| Image (Media Center) | ||||
| Compatible with (Media Center) | Raspberry Pi Zero (W), Raspberry Pi Zero2 W | Raspberry Pi Zero (W), Raspberry Pi Zero2 W | Raspberry Pi Zero (W), Raspberry Pi Zero2 W | Raspberry Pi Zero (W), Raspberry Pi Zero2 W |
| Image (Hat) | ||||
| Compatible with (1X Hat) | Every Pi | Every Pi | Every Pi | Every Pi |
| Image (Hat, 2X) | ||||
| Compatible with (2X Hat) | Raspberry Pi 5 | Raspberry Pi 5 | Raspberry Pi 5 | Raspberry Pi 5 |
| DAC | Single PCM5100A 32bit Stereo DAC | Single (1X) or Dual (2X) PCM5100A 32bit Stereo DAC working with TPA3110D2 D-Class amp | Dual (1X) or Quadruple (2X) I2S DAC MAX98357 with built in D-Class amp | (1X) Stereo I2S DAC TAS5805M with built in D-Class amp(2X) Dual (2.1) I2S DAC TAS5805M with built in D-Class amp |
| Output | 2.1 VRMS Line level output -100 dB typical noise level | [1X]2x 25W (8Ω, 1% THD+N) at 22V; 2x 22W (4Ω, 1% THD+N) at 16V 1x 40W (4Ω, 1% THD+N) at 20V[2X]4x 25W (8Ω, 1% THD+N) at 22V; 4x 22W (4Ω, 1% THD+N) at 16V 2x 40W (4Ω, 1% THD+N) at 20V | [1X] 2x 3W (8Ω); 2x 5W (4Ω) [2X] 4x 3W (8Ω); 4x 5W (4Ω) | [1X] 2x 22W (8Ω, 1% THD+N); 2x 32W (4Ω, 1% THD+N) at 20V 1x 45W (4Ω, 1% THD+N) at 20V [2X]: 2x 22W (8Ω, 1% THD+N) + 1x 45W (4Ω, 1% THD+N) |
| RGB LED | Media Center only | Media Center only | Media Center only | Media Center only |
| IR input | yes | yes | yes | yes |
| Onboard Serial Bridge | Media Center only | Media Center only | Media Center only | Media Center only |
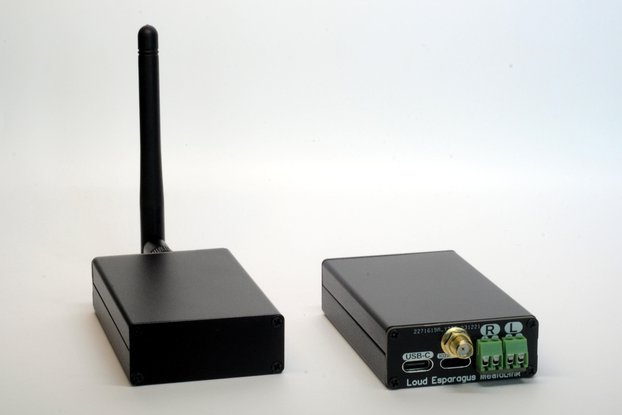
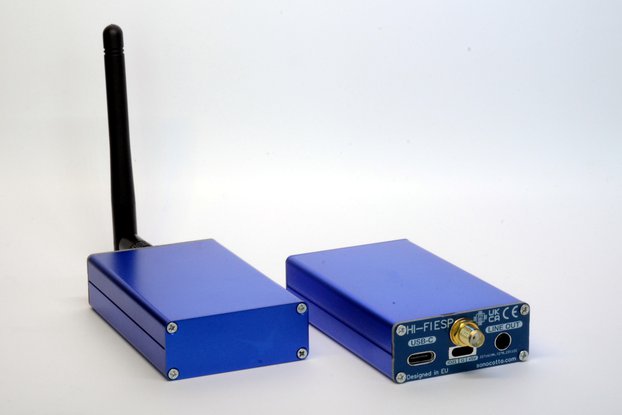
| Ethernet (Media Center) | Wiznet W5500 SPI Ethernet | Wiznet W5500 SPI Ethernet | Wiznet W5500 SPI Ethernet | Wiznet W5500 SPI Ethernet |
| Powers from | Media Center: 5V USB-C power adapter (up to 1 A)Hat: 5V from the host Internally: LP5907 3.3 V Ultra-Low-Noise LDO | 8..26V from external sourcepowering host (up to 3A cont.) | Media Center: 5V USB-C power adapter (up to 3 A) Hat: 5V from the host (up to 4A) or 5V from screw connector (powering host) | 65W USB-C PD power adapter [NOPD] Up to 26V from external PSU[Hat] 7..28V from external sourcepowering host (up to 3A cont.) |
| Mechanical dimensions (WxHxD), Media Center | 88mm x 38mm x 100mm | 88mm x 38mm x 100mm | 88mm x 38mm x 100mm | 88mm x 38mm x 100mm |
| Mechanical dimensions (WxHxD), Hat | 65mm x 30mm x 15mm | 70mm x 61mm x 20mm | 65mm x 30mm x 20mm | 65mm x 56mm x 20mm |
| I2S CLK | I2S DATA | I2S WS | TPA3110 EN | |
|---|---|---|---|---|
| Raspberry Pi Zero | 18 | 21 | 19 | [Rev A, B] 5,6 |
| Raspberry Pi 2,3 | 18 | 21 | 19 | [Rev A, B] 5,6 |
| Raspberry Pi 5 | 18 | 21, 23, 25, 27 | 19 | [Rev A, B] 5,6,7,8 |
You need nothing more than an SD card with a Raspbian image and a USB-C power brick. You can use any distribution you like. The only change you need to make to enable hardware is to add 3 lines to the /boot/config.txt
dtoverlay=hifiberry-dac
Originally, amps could be shut down using GPIO pins, but in the latter version of the board, I removed that functionality. The reason is that TPA3116 doesn't have a dedicated MUTE pin, and I was using the SHDN pin for that purpose. Changing the voltage on that pin created a pop sound, no matter how slowly I changed the voltage. I'm planning to switch to a more modern TPA32XX series going forward to solve this issue.
If you have early board and want to control the amp using GPIO, you may use software integration to pull GPIO5/6 HIGH or LOW to switch the amp ON and OFF.
The project repository provides a few examples with build instructions, including Volumio setup instructions, among others.
Please visit the hardware section of the project repo for board schematics and PCB designs. Note that PCBs are shared as multi-layer PDFs as well as Gerber archives.
| 1X | 2X |
|---|---|
Raspberry Pi 5 is the first one that allows the user to drive multiple I2S data lines using the same interface. What it means in practice is that while all older Pis have just 3 I2S lines (CLK, WS, DATA), Pi5 supports up to 4 Data lines (CLK, WS, D0, D1, D2, D3), capable of driving 4 independent audio interfaces.
2X Raspberry Pi hats support alternative data lines. You need to short some solder bridge to use it, though. It allows configuring Hats to use different pins and stack them together to create 4 individual stereo interfaces (8 channels in total) using the same device.
By default, the 2X hat uses pins 21,23 for data, with the possibility to switch to pins 25 and 27 with solder bridges and stack 2 boards together.
| HiFi Hat (rev C) | HiFi Hat (rev D) | HiFi-Amped Hat | Loud Hat |
|---|---|---|---|
The configuration value that allows this is quite simply
dtoverlay=hifiberry-dac8x
At this point, all Hats with 1X marking a single DAC version that can be used with every Pi, including Pi 5. The 2X version uses two data lines of the Pi5 and will work out of the box with it. It can be changed to use a second set of data lines, so 2 boards stacked together will utilize 4 DACs or 8 channels of audio. You can short data lines together and use 2X Hat with Pi2/3/4, having 2 parallel DAC channels.
Buy with confidence.
Our Tindie Guarantee protects your purchase from fraud. Learn More

$21.00

$16.00

$69.00

$24.00
$45.00

$20.00
$45.00

$49.00
/i/936912/products/2025-02-09T21%3A48%3A38.432Z-DSC_0133.JPG?1739108997)