ESP32 based streaming media center that kicks a punch
Designed by Sonocotta in Poland
Buy with confidence.
Our Tindie Guarantee protects your purchase from fraud. Learn More
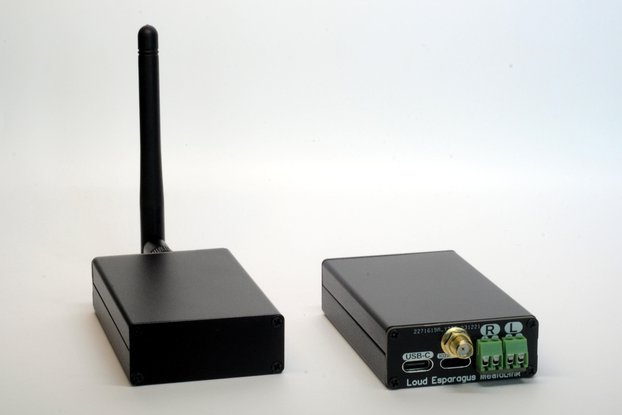
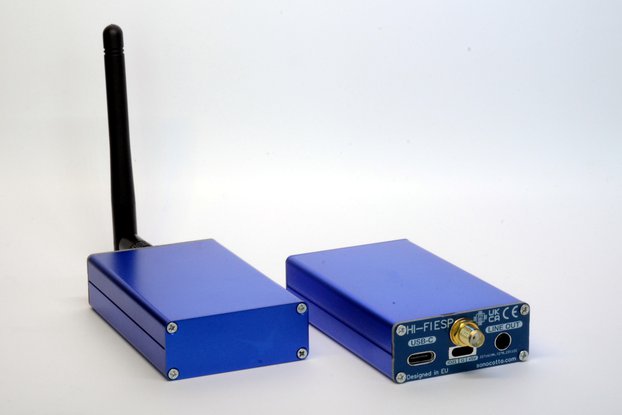
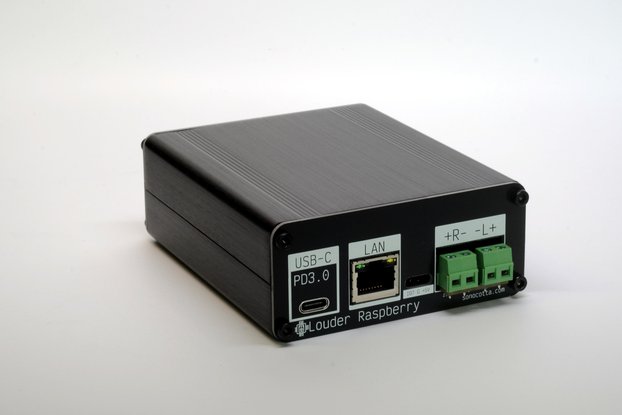
What is it Louder Esparagus is a top-of-the-range Esparagus model that uses modern highly capable TAS5805M DAC together with ESP32 MCU and is aimed to be paired with medium-to-large speaker systems.…
Read More…Louder Esparagus is a top-of-the-range Esparagus model that uses modern highly capable TAS5805M DAC together with ESP32 MCU and is aimed to be paired with medium-to-large speaker systems. With 25W per channel stereo output, it packs a punch and can easily enlive living quarters or dorm rooms.
It is highly efficient, but much more demanding for power when cranked, therefore it uses either a USB-C Power Delivery to pull up to 65W from the wall power adapter or external power source for NOPD variant.
It can be used both with Wi-Fi and Ethernet (to make sure bad Wi-Fi would not interrupt the stream)
| USB-PD | NOPD |
|---|---|
I did few audio projects in the past, some using ESP32, some using larger Orange Pi and Raspberry Pi devices. Each has its pros and cons, and with each iteration, I'm trying to focus on the details that were working best for me, while actually using them.
What I like about ESP32 is how lightweight it is. It barely draws power, so you may not care to turn it off at all. It boots in seconds and is ready for use in a snap. Still, it is capable and works at par with Linux SBC solutions for audio applications, while costing a fraction of their price. Combined with a proper Hi-Fi DAC you would not tell a difference to commercial devices standing side by side and costing much more.
Over the last few years, I have seen a few amazing software products created to deliver audio on the ESP32, like squeezelite-esp32 or euphonium. Esparagus media center devices are designed specifically to run these great pieces of software and bring a new life into aging audio equipment that most of us have at home but do not use that much these days, since it is not working with Spotify and the family.
Audio streaming requires proper buffering to work, even with ESP32 500K of RAM it is a challenging task. All Esparagus boards are based on WROVER modules that have an onboard PSRAM chip.
| HiFi Esparagus | Loud Esparagus | Louder Esparagus | Amped Esparagus | |
|---|---|---|---|---|
| Image | ||||
| MCU | ESP32-WROVER-N8R8 | ESP32-WROVER-N8R8 | ESP32-WROVER-N16R8 | ESP32-WROVER-N16R8 |
| DAC | PCM5100A 32bit Stereo DAC -100 dB typical noise level | Dual I2S DAC (MAX98357) with built in D-Class amp | Stereo I2S DAC ( TAS5805M ) with built in D-Class amp | PCM5100A 32bit Stereo DAC working with TPA3110D2 D-Class amp |
| Power | 5V over USB-C, 2x LP5907 3.3 V Ultra-Low-Noise LDO for analog section | 5V from USB-C | Up to 20V from USB-C PD or up to 26V from generic power adapter | Up to 20V from USB-C PD or up to 26V from generic power adapter |
| Output, 4Ω | Non-amplified stereo output | 2x 3W | 2x 32W (4Ω, 1% THD+N) | 2x 22W (4Ω, 1% THD+N) at 16V 1x 40W (4Ω, 1% THD+N) at 20V |
| Output, 8Ω | - | 2x 5W | 2x 22W (8Ω, 1% THD+N) | 2x 25W (8Ω, 1% THD+N) at 22V |
| PSRAM | 8MB PSRAM (4MB usable) | 8MB PSRAM (4MB usable) | 8MB PSRAM (4MB usable) | 8MB PSRAM (4MB usable) |
| Peripheral | WS2812B RGB Led SSD1306 128x64 OLED screen (optional) | WS2812B RGB Led SSD1306 128x64 OLED screen (optional) | WS2812B RGB Led SSD1306 128x64 OLED screen (optional) | 8xWS2812B RGB Led SSD1306 128x64 OLED screen (optional) Rotary encoder with push button |
| Connectivity | WiFi BT4.2 BLE | WiFi BT4.2 BLE | WiFi BT4.2 BLE W5500 Ethernet | WiFi BT4.2 BLE W5500 Ethernet |
| Size | 80 x 50 x 20mm | 80 x 50 x 20mm | 100 x 80 x 38mm | 100 x 80 x 38mm |
| Software support | Arduino samples, squeezelite-esp32, snapcast, ESPhome config | Arduino samples, squeezelite-esp32, snapcast, ESPhome config | Arduino samples, squeezelite-esp32, snapcast, ESPhome config | Arduino samples, squeezelite-esp32, snapcast, ESPhome config |
| ## Board Pinout |
| I2S CLK | I2S DATA | I2S WS | PSRAM CE | PSRAM CLK | DAC EN (MAX98357A) | |
|---|---|---|---|---|---|---|
| ESP32 | 26 | 22 | 25 | 16 | 17 | 13 |
| SPI HOST | SPI CLK | SPI MOSI | SPI MISO | LAN RES | LAN CS | LAN INT | OLED DC | OLED CS | OLED RST | |
|---|---|---|---|---|---|---|---|---|---|---|
| ESP32 | 2 | 18 | 23 | 19 | 14 | 5 | 35 | 4 | 15 | 32 |
| I2C CLK | I2C DATA | PWDN | FAULT | |
|---|---|---|---|---|
| ESP32 | 27 | 21 | 33 | 34 |
| USB-PD EN | USB-PD POWER GOOD | IR INPUT | WS2812 RGB LED | |
|---|---|---|---|---|
| ESP32 | 13 | 36 | 39 | 12 |
In the software section two firmware examples are provided.
All samples are provided as Plarformio IDE projects. After installing it, open the sample project. Select the proper environment based on your dock. Run the Build and Upload commands to install necessary tools and libraries, and build and upload project to the board. Communication and proper upload method selection will be handled by IDE automatically.
Follow the ESP8266Audio library guide.
Being an ESP32-based device, you can easily integrate it into your Home Assistant using ESPHome. Please find detailed instructions on the linked github
Squeezelite-ESP32 is a multimedia software suite, that started as a renderer (or player) of LMS (Logitech Media Server). Now it is extended with
And LMS itself
Use Esparagus Squeezelite-ESP32 installer to flash the firmware. It has been preconfigured to work with Esparagus boards and will configure all hardware automatically.
Please find detailed instructions on the linked github
Please visit the hardware section for board schematics and PCB designs. Note that PCBs are shared as multi-layer PDFs as well as Gerber archives.
| Louder Esparagus |
|---|
| Louder Esparagus NOPD |
|---|
| Louder Esparagus |
|---|
TAS5805M DAC Allows 2 modes of operation - BTL (stereo) and PBTL (parallel, or mono). In Mono amp will use a completely different modulation scheme and basically will fully synchronize output drivers. Jumpers on the board allow both output drivers to connect to the same speaker. The most important step is to inform the Amp to change modulation in the first place via I2C comman. In the case of sqeezelite DAC controlsset value is the following: dac_controlset: {"init":[{"reg":3,"val":2},{"reg":3,"val":3},{"reg":2,"val":4}],"poweron":[{"reg":3,"val":3}],"poweroff":[{"reg":3,"val":0}]}
compared to default: dac_controlset: {"init":[{"reg":3,"val":2},{"reg":3,"val":3}],"poweron":[{"reg":3,"val":3}],"poweroff":[{"reg":3,"val":0}]}
One can test audio with a single speaker connected between L and R terminals (plus on one side and minus on the other). Optionally, jumpers on the board will effectively connect the second driver in parallel doubling the current capability.
Important point, this will send only one channel to the output, that’s just how the DAC works. True mono as (L+R)/2 is possible via more in-depth configuration (very poorly documented), but I haven’t managed to configure that on the stand. I’m still working on that. (Along with a few more really cool DSP features that this DAC has, like EQ, subwoofer mode and tone compensation settings)
| BTL | PBTL | |
|---|---|---|
| Descriotion | Bridge Tied Load, Stereo | Parallel Bridge Tied Load, Mono |
| Rated Power | 2×23W (8-Ω, 21 V, THD+N=1%) | 45W (4-Ω, 21 V, THD+N=1%) |
| Schematics | ||
| Speaker Connection |
Starting from Rev E, an additional header is exposed to allow datasheet-specced connectivity
| Image | Legend |
|---|---|
| Stereo Mode - leave open | |
| Mono (PBTL) Mode, close horisontally |
The TAS5805M DAC has a very powerful DSP, that allows doing lots of data processing on the silicon, that otherwise would take a considerable part of your CPU time. As of the moment of writing it is mostly an undiscovered part of the DAC, since unfortunately, TI is not making it very easy for developers. (A minute of complaint) To be more specific, you need to be (A) a proven hardware manufacturer to get access to the configuration software, namely PurePath. (B) you need to apply for a personal license and go through an approval process, and after a few weeks of waiting you get access to one DAC configuration you asked for. (C) You find out that it will work with TI's own evaluation board that will set you back $250 if you'd be able to find one. Otherwise, all you have is a list of I2C commands that you need to transfer to the device on your own cost. No wonder no one knows how to use it.
But moanings aside, what do you get after:
At this moment it is very experimental. In the perfect world, you should be able to adjust all of those settings to make your speaker-enclosure setup work the best it can, and even apply your room factors into the equation. But with above disclaimer I can only deliver limited set of configurations corresponding to the most common use cases:
All of the above are available right now for experimentation. I'm keen to hear your feedback while I moving forward with porting this to other software options
The Louder Espragus can be quite a power-hungry device, simply using 5V over the USB-C is clearly not an option. The intention for using a PD-enabled power adapter to run the board is simplicity and ease of use for customers. Ideally, you should supply a 20V 3.25 Amp capable power source, which is common for modern laptops (Dell, HP, and Lenovo have all tested and work perfectly). However, pretty much any 9V/12V/20V PD-enabled power adapter will work, most typically phone chargers with a quick charge option. The smallest of the family is a 25W model, which is plenty enough for a living space.
The interesting part was all the phone and laptop chargers I used for the test (around five different makes of each), sounded great, with no hissing, no popping. (Apart from the Apple ones, they didn’t work. Likely they have Apple-specific PD protocol). This is probably because modern devices have become so noise-sensitive that manufacturers have been forced to do good work on noise levels.
Tested and perfectly working models are (others may be available)
| Model | Image |
|---|---|
| 65W USB-C Lenovo ThinkPad Laptop Charger Replacement Power Adapter | |
| 65W 45W 20V 3.25A Type-C PD Laptop Charger | |
| 120W Gan Type-C PD Charger | |
| 45W Type-C PD Mobile Phone Wall Adapter |
Because USB-PD is a bit of a Wild West in terms of standards, sometimes not everything goes as designed. Some people have run into this with power adapters that aren’t fully PD-standard compliant. In most cases, the worst that happens is the PD chip doesn’t trigger the 20V mode, so the Esparagus runs at around 5W per channel (which you might not even notice). One person reported that an older adapter somehow triggered just 1V on the USB-C power line, shutting down the Esparagus shortly after plugging in. Thankfully, we’ve confirmed that it works correctly with newer laptop adapters.
The “hammer-style” solution I came up with is a new NOPD version of the Louder Esparagus that lets you use a barrel power jack to supply raw voltage directly. The catch? Standard 2mm pins can’t handle high currents, so I’ve gone with a 2.5mm pin instead — it’s a bit unusual but still common enough in the laptop world.
With this setup, you can supply more than the 20V limit of PD, giving you a bit more power for the speakers. You probably won’t hear much difference (thanks to the way human hearing works), but it could help larger speakers that need a bit more to really “open up." Other than that, the NOPD version works just like the PD version — no software changes are needed.
The power adapter specs depend on the speaker you're planning to use. DAC efficiency is close to 100%, so just take the power rating of your speaker (say 2x10w), and impedance (say 8 ohms) and you'd need at least 9 volts rated at 1.2 amps per channel, round up to 3 total amps.
It is not recommended to go beyond the voltage your speakers can take, otherwise, the amp will blow your speakers in no time.
The absolute maximum voltage for the TAS5805M DAC is 30V, but it is not guaranteed to be thermally stable in this condition.
All boards have an OLED screen header. Originally I had plans to have it as a feature (It is quite nice when using squeezelite since you can get quite a lot with existing plugins and settings). Later on, I disregarded this as a generally available feature, since it is quite a time-consuming task to solder it in place, and I had no really good idea how to fix the screen in place. Despite that, the header is present on every board revision and it works.
At this moment one can solder the compatible OLED screen and use it with the transparent front panel as a bedside clock or to display the current track (I prefer smoked glass for the final look of it). It takes a few minutes for a skilled engineer to solder it in place and a small strap of double-sided adhesive to fix it mechanically.
| A | B | C |
|---|---|---|
The final result is a nice and finished look
Most of the 64x128 pixel OLED screen models that are very common among hobbyists will use compatible 30-pin ribbon connector with 0.7mm pin spacing, and they are really easy to desolder.
You can also find bare screens if you spend a minute. Below are the tested models, although there are plenty more out there.
| Model | Image |
|---|---|
| 0.96" OLED Display 128X64 SSD1306 | |
| 1.3" OLED Display 128X64 SH1106 |
Although you're free to use it your way using the pinout above, I'd expect the most common case to be squeezelite, thus here are the steps you'd need to do
| # | Description | Image |
|---|---|---|
| 1 | Update NVS settings in the Web UI (switch to recovery mode first) display_config = SPI,width=128,height=64,cs=15,reset=32,driver=SH1106,HFlip,VFlip spi_config = mosi=23,clk=18,host=2,miso=19,dc=4 You may need to replace SH1106 with SSD1306 depending on your model. |
|
| 2 | In the LMS settings install the SqueezeESP32 plugin |
|
| 3 | Update each speaker's settings in the LMS, and navigate to Display settings |
No country selected, please select your country to see shipping options.
No rates are available for shipping to .
Enter your email address if you'd like to be notified when Louder Esparagus Media Center can be shipped to you:
Thanks! We'll let you know when the seller adds shipping rates for your country.
| Shipping Rate | Tracked | Ships From | First Item | Additional Items |
|---|---|---|---|---|
|
:
|
Most of the packages are sent the next business day in the morning CET time. Delivery time varies wildly, but typically it is 1-2 weeks within EU and 3-4 weeks outside EU due to delays in customs. If the package does not show up after 8 weeks, please reach out for a replacement or refund.
| Quantity | Price |
|---|---|
| 1 | $69.00 |
| 2-3 | $65.00 |
| 4+ | $60.00 |
Buy with confidence.
Our Tindie Guarantee protects your purchase from fraud. Learn More

$21.00
Free Shipping!

$21.00
Free Shipping!

$16.00
Free Shipping!

$24.00
Free Shipping!

$45.00
Free Shipping!

$21.00
Free Shipping!

$45.00
Free Shipping!

$49.00
Free Shipping!
By clicking Register, you confirm that you accept our Terms & Conditions
We recognize our top users by making them a Tindarian. Tindarians have access to secret & unreleased features.
We look for the most active & best members of the Tindie community, and invite them to join. There isn't a selection process or form to fill out. The only way to become a Tindarian is by being a nice & active member of the Tindie community!
